Magic Shop Owners Session 21
Session Notes
Calendar Date: 40-3-596 - 42-3-596
AI Podcast Overview (From NotebookLM)
The Tomb
Where the Adventurers Explored in the Tomb:
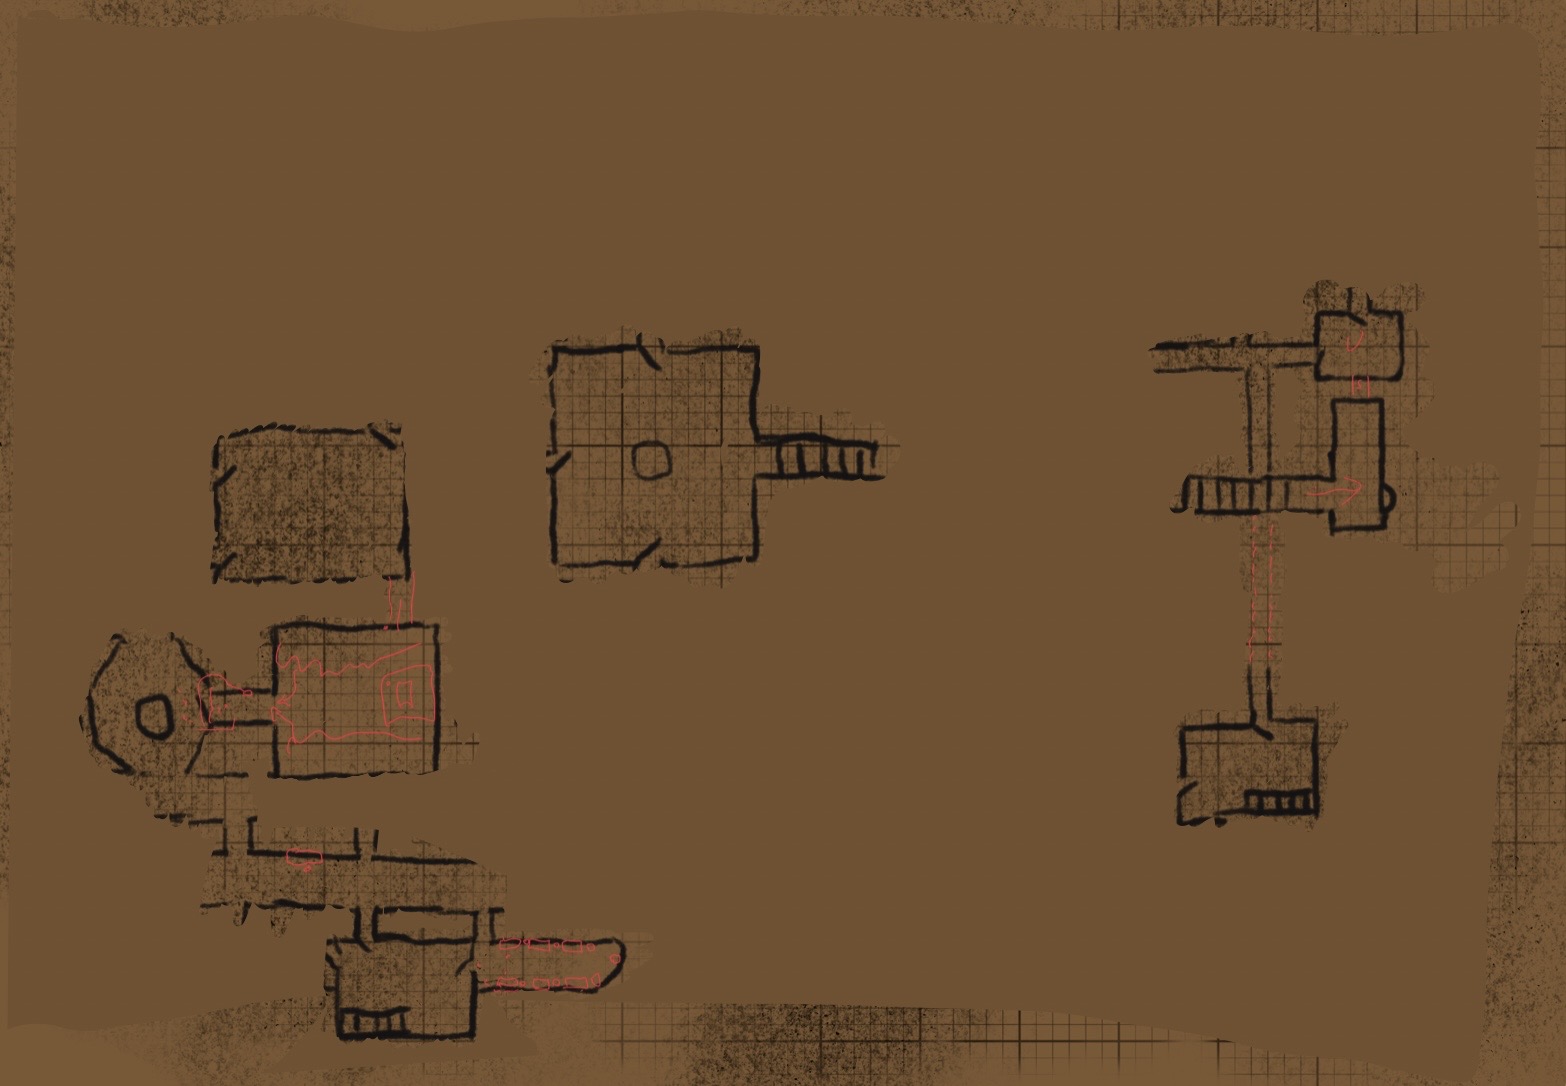
- The party got their bearings within the stale storeroom of the Tomb of the Elephant King
- The other came out of the painting
- Maia read through the trap book so she could identify any that might come up
- The took the west door of the tomb which took some effort to unstick, but they managed to open it by tying a rope to the door and all pulling on it
- They then rolled flaming a barrel down the corridor to both check for traps and see what was down there
- No traps were triggered and many other corridors were revealed
- They decided to take the first corridor on the right
- They walked for a long way before seeing a glow in the distance. It appeared to be a pit filled with lava
- They cautiously approached, but Maia recognised what this trap might be from the trap book. There was an invisible wall on the other side of the pit if she was right
- Breadwig poked across with his ten foot pole and felt resistance from the invisible wall.
- Everyone began searching for a way to disable it. Magma found a button and there was a slight shimmering where the wall was that slowly faded
Hop Skip Jump Trap (Grimtooth):
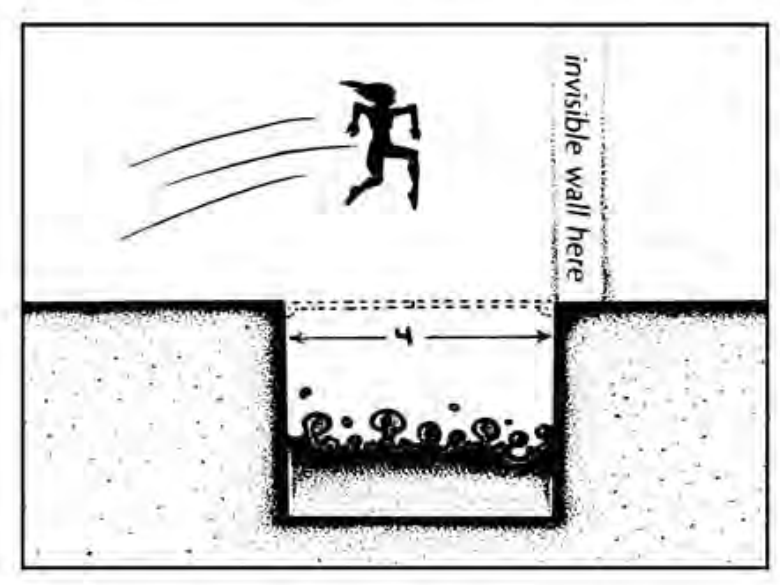
- Maia flew across with her levitation boots without issue and then took everyone across one by one
- They eventually reach a room at the end of the sandstone corridor that was open and covered with murals depicting the life of the elephant king. This room had many doors and some stairs that lead down to the lower floor
- Maia was cautious of the stairs after seeing a trap that would activate if someone stood on a false step and snare them in the trap book.
- She warned the others and they tapped the stairs in front of them, identifying, and avoiding the trapped step
Stair Snare Trap (Grimtooth):
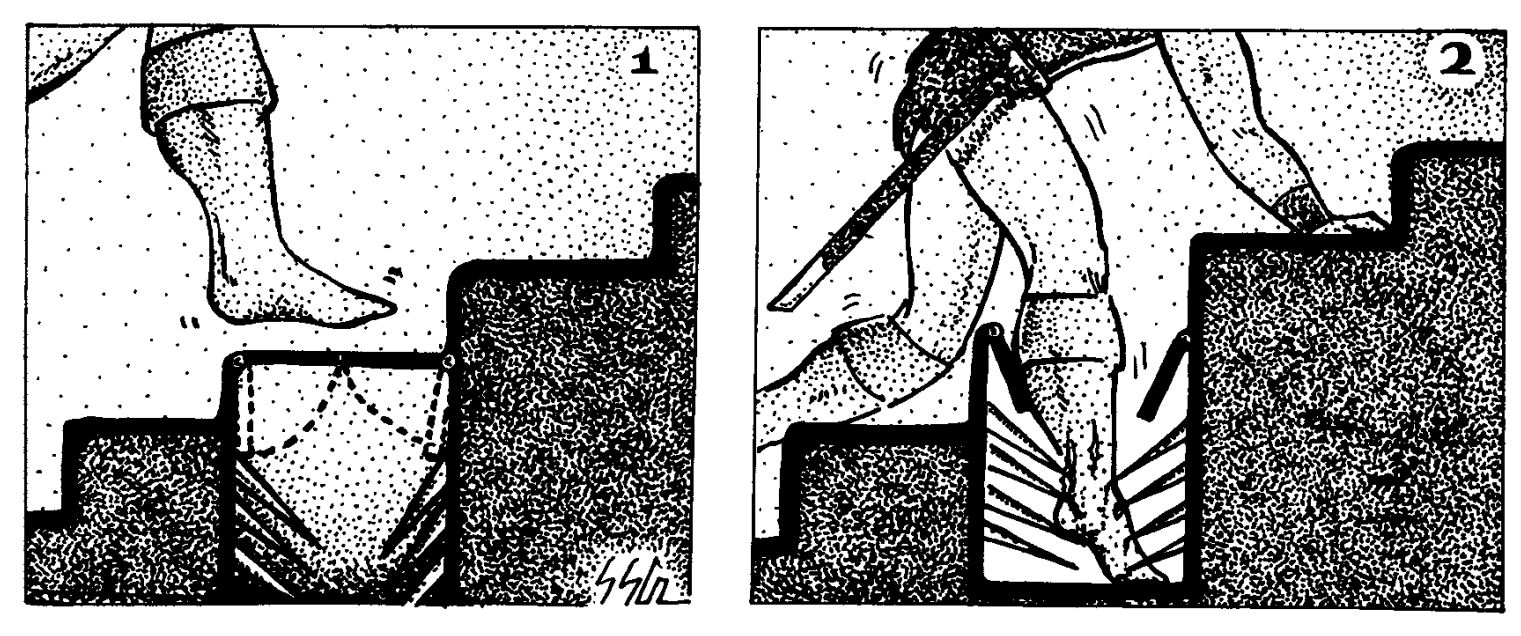
- As they made their way down though the ceiling of the upper floor began pouring heaps of sand
- Acting quickly Magma used his dragonborn fire breath and turned the glass to sand blocking the hole it had flooded from
- The party continued down to the lower floor
- The room they found themselves in also had similar murals, but these were much darker and had the people of the elephant king suffering after the water had gone.
- This room also had many doors
- They tried the east door which was also stuck like the previous doors they had tried. They attempted to barge it down, but failed many times making a fair amount of noise
- Eventually the broke through the door and into an ornately decorated catacomb
- Before them the walls were lined with sarcophagi and between them stone statues with heads of various different animals
- The closest statue came to life and began marching towards the party. It also had a slowing aura which made many of the party move far slower than usual
- Jatumal launched a disintegration arrow at it and was able to hit the shoulder removing an arm from the hulking construct
- The rest of the party and the adventurers who travelled with them fired a volley of attacks at the statue all of which did little more damage to the statue but did make a considerable racket
- The golem Tried to punch Geog, but with it attempted with its missing arm and achieved nothing, but the four closest sarcophagi began to open and mummified dwarven hands began to reach out
- Magma used his fire breath once again fusing the metal of the sarcophagi shut and disintegrating the hands, but doing no damage to the golem
- The rest of the party continued to try to penetrate the defences of the huge stone statue to little avail
- The golem, now using the correct arm, swung and took the head clean off one of the three adventurers from the other party who were still left, and another statue came to life backing it up
- There was another volley of attacks which continued to do little to the golems
- Breadwig skirted around the golems looking for a weak spot and saw a dim blue glow from a small hole between the shoulders of the golem. He pointed it out to the others
- One of the golems stomped another adventurer killing him and the other knocked the leader from the other adventuring party against the wall leaving him severely wounded
- Geog ran in with Darkfire and was able to chip off part of one of the golems, as he did Jatumal sprung of him and attempted to shoot one of the golems from behind in this weak spot, but the shot went wide
- The adventurer hid in the room they had come from with Gareth
- Maia flew around the golems carrying Jutara and they were able to swipe a crystal from one of the golems. Breadwig pulled one from the other
- Then Jatumal called upon Antony, the magic cleaning ants, to dislodge the crystals of any further statues. They were able to power them off, but not return the crystals to Jatumal.
- They continued down a corridor a short way to find it was a dead end
- Breadwig was interested in the power of the crystals so convinced some of the others to help him pull over one of the statues with a rope so that he could get some more
- They did so with a loud bang and as this happened 3 more sarcophagi lids began to open
- The mummies inside were out before Magma could stop them this time. The terrifying aura of the mummies temporarily paralysed, Jutara and Smuv in fear, but the other quickly began their assault on them making short work of one which Breadwig finished off by throwing his Ignid tooth dagger at it. As the dagger hit the mummy's chest it went up in flames and then fell to the ground as ash.
- As the other mummies attacked, and missed, Smuv and Jutara fell out of their stupor. Amongst the party they made short work of one of the other mummies. Then Jutara attacked the final mummy with Soulrend, the sword she previously called Galileo which Sarzan had just deciphered the name of, splitting the soul of the mummy from the body. The mummy instantly flopped to the floor dead and a ghost rose from the body
- The ghost turned out to be friendly and agreed to lead them to the main chamber of the tomb as long as they didn't take the djinni lamp because it had caused nothing but trouble. The party lied and agreed
- The party were now quiet knowing that noise awoke the guardians of the tomb
- Along the way Jatumal tripped and another sarcophagi began opening up and the final adventurer was dragged in and to it. The adventurers managed to close the lid on it stopping the mummy from escaping, but condemning the adventurer to death. Geog sat on the coffin while the others sealed it
- Eventually, after winding through the catacombs, they got to a large chamber with a tall cylindrical hole at the top and a pool in the centre. There were many entrances to the room but on one side was a portcullis
- On the other side of the portcullis was a room full of treasure and an ornate sarcophagi with an elephant head. Next to the coffin was a lamp
- Between the party they heaved the portcullis open and magma headed into the room intending to secure the mechanism on the other side and keep the gate open, but four mummified cats rounded the corner. He used if fire breath disintegrating both the cats and the mechanism
- One of the other adventurers threw Magma a rope and he secured that to the burnt off end of the rope and pulled the portcullis up tying the rope to a pillar
- They made their way into the room which contained many treasurers. Everyone collected a magic item of great values and Jatumal expanded the Kraken and began shovelling treasure into it. There must have been close to 30,000 gold worth of treasure in the room
- Meanwhile, Maia and Geog investigate the room for secret door and found on in the corner of the room behind the sarcophagus. This room was also filled to the brim with gold. They entered finding themselves very hot and the door slammed behind them. The room was so hot that both Maia and Geog started burning up
- Breadwig reopened the door from the other side and Maia and Geog rushed out. Everyone decided not to go back in
- Next they took the lamp, and the dwarf ghost became very upset and flew away, but the lamp turned out to just be a normal lamp
- They then opened the sarcophagus revealing a mummified dwarf clutching another lamp. This was the legendary djinni lamp
- They called upon the djinni and began talking to it. It asked them what they wanted to wish for and explained that it would be released from its prison of the lamp after the wish was made. It said it had tricked the Elephant King because it thought that his wishes were unfair.
- The party had much discussion and debate about what to wish for. They consulted Sarzan and he was also stumped. So they wished that the Tarrasque would drop dead where it was and be left wherever it was (so they could loot the body)
- They also mentioned to the djinni before it left that it should return the water to the Emerald Desert because that wasn't fair on the people who were being exploited by Heston. It said it would think about it before flying away
- Maia then used here levitating boots to fly up the long cylindrical shaft and found a mechanism which she turned revealing a room with a pedestal and a riddle which she ignored. These were another method to get down to the bottom of the tomb
- She found the ramp which lead down to the entrance with the rolling trap from last session and having found a shortcut flew the other members of the party up, apart from Magma who used his pigeon ring
- They then went down the ramp, pushed the rolling trap out of the way, lifted the door and exited the tomb to find themselves on an island. They were completely surrounded by water. It seemed the djinni may have overcompensated
- Fortunately the party had the Kraken. Jatumal pulled it out and everyone hoped on
- They sailed to where Neverwell had been, bit having been in a quarry it was completely submerged. They saved the survivors they could who were floating on debris from the town, managing to get around 100 people onto the boat and the made their way south back to the Rocky Slopes
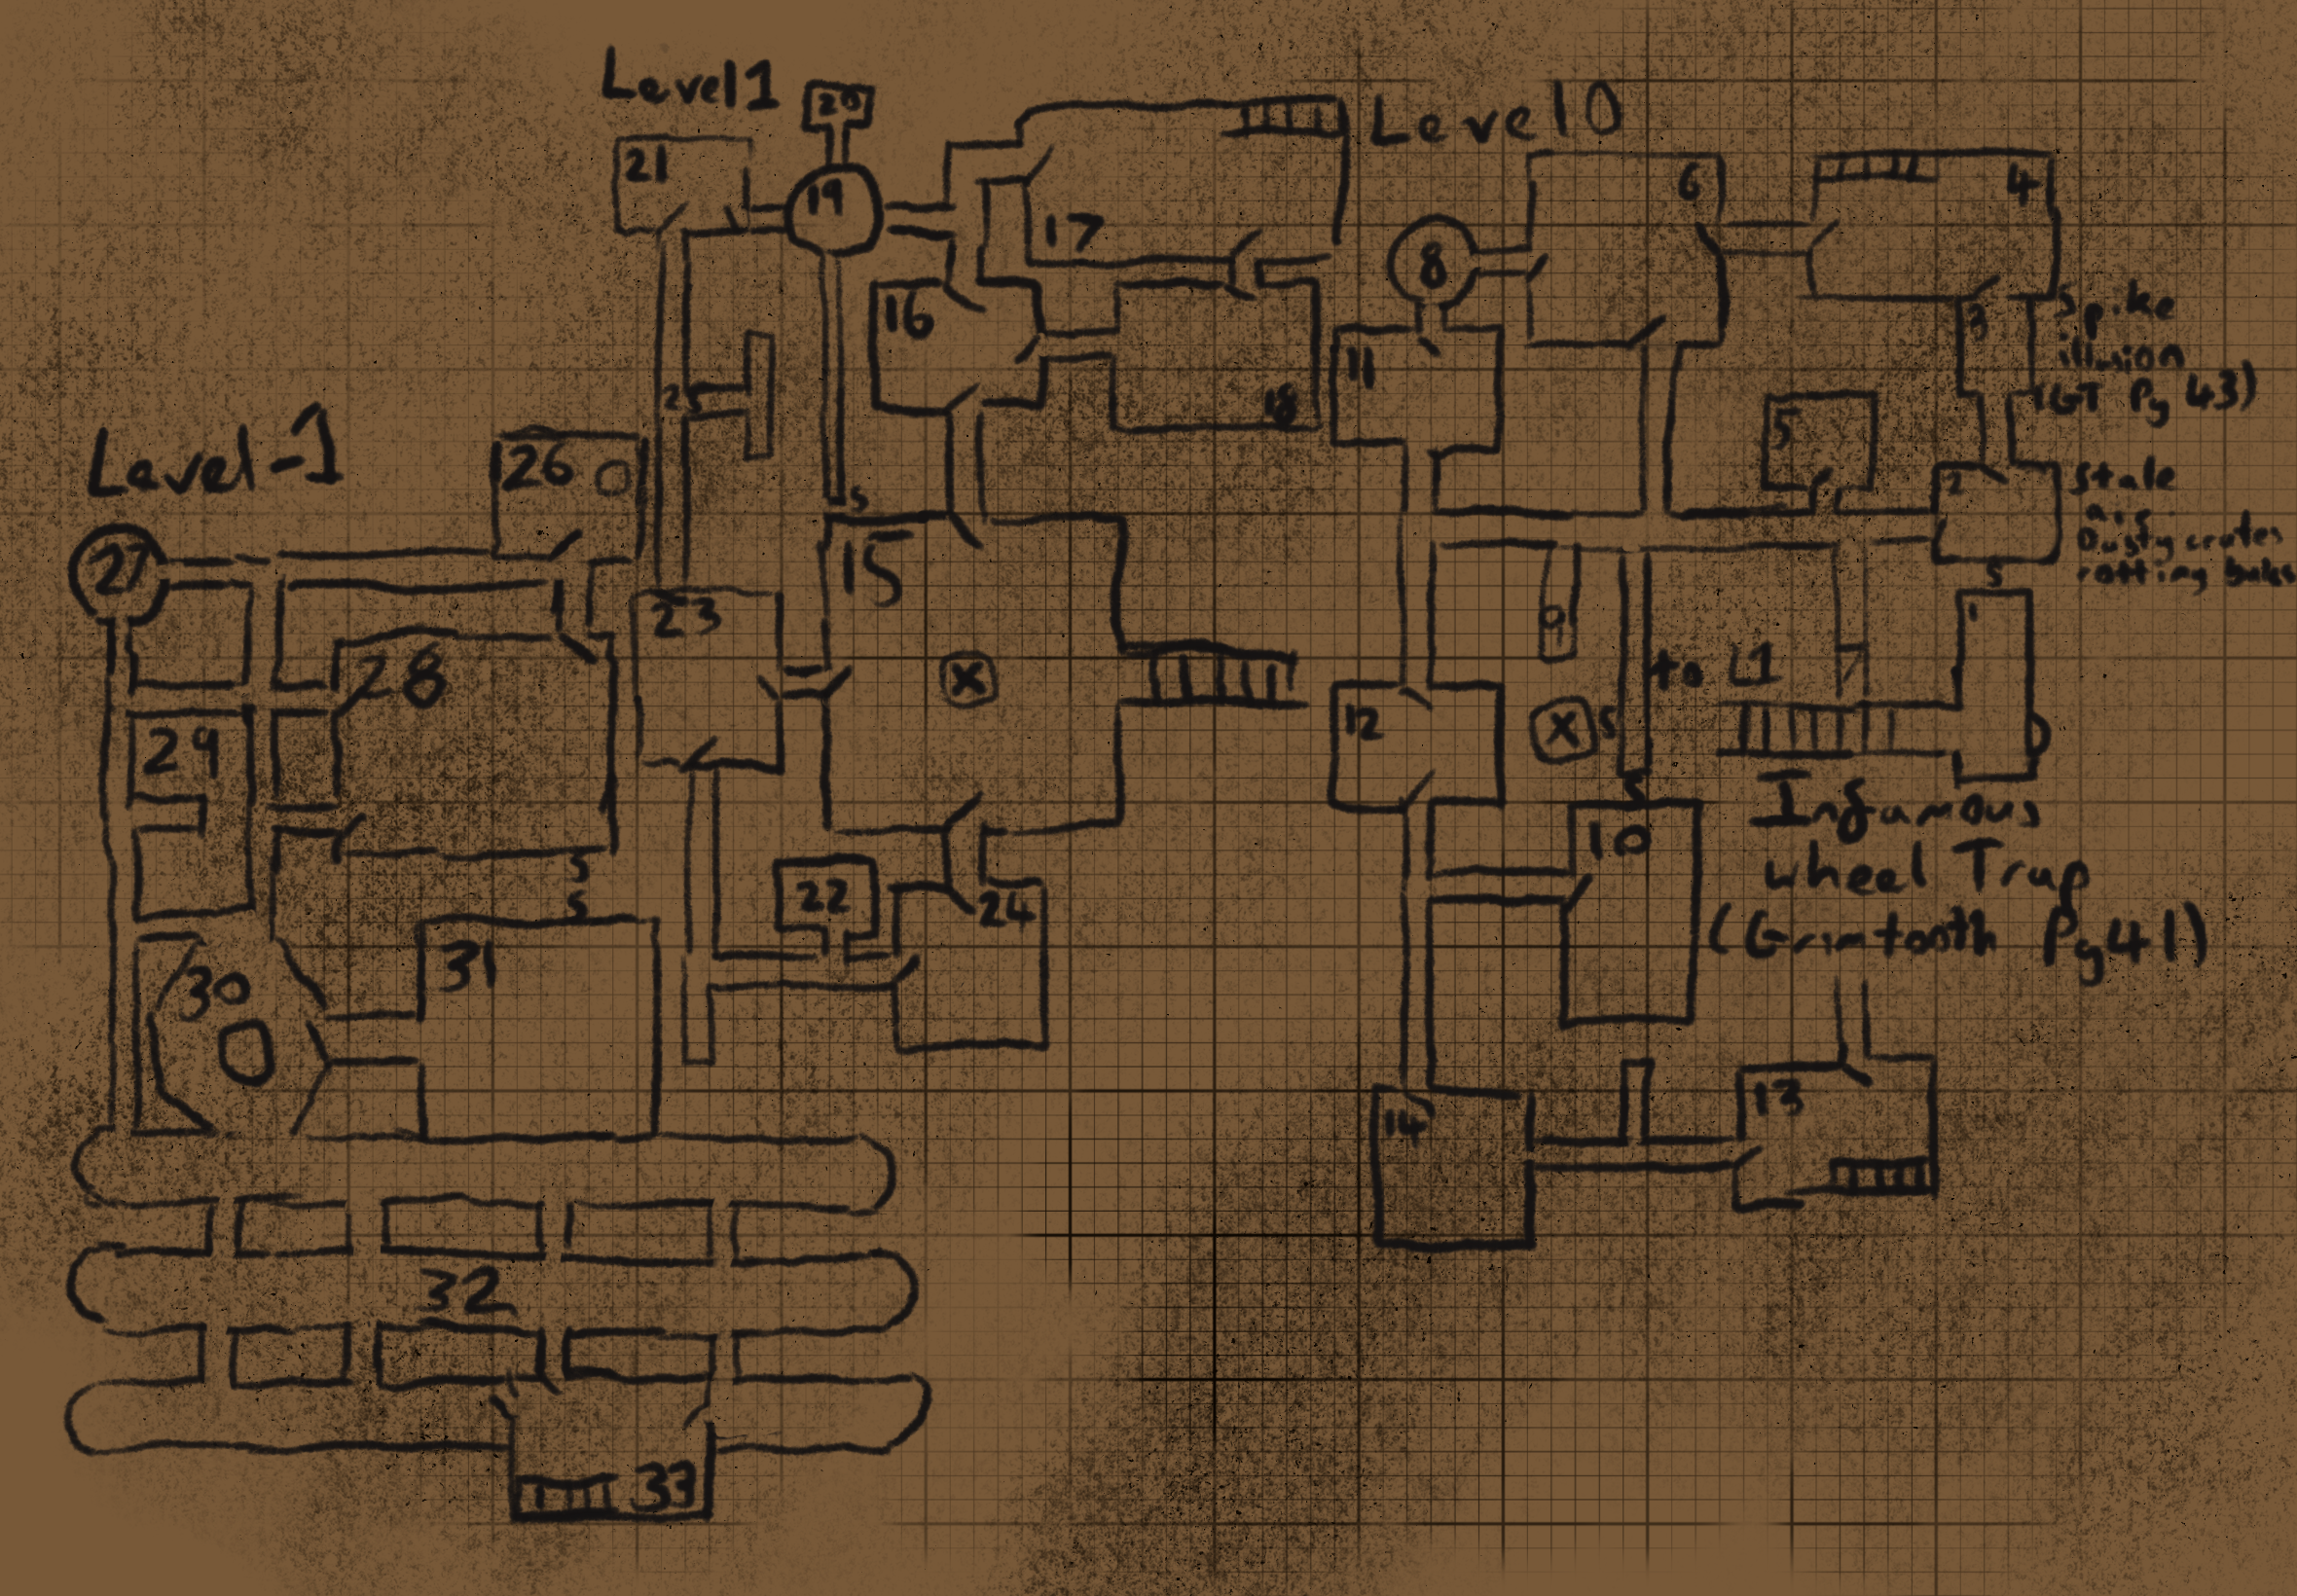
The Full Map of the Tomb:
XP
30000 xp = Treasure
4600 xp = 2 x Stone Golem
2400 xp = 6 x Mummy
52 xp= 4 x Cat Mummy
37052/7 = 5294 xp each
| Character | XP After Last Session | Current XP |
|---|---|---|
| Jatumal (Wood-Elf4) | 14248 | 19542 (Need to get to 24000 xp to level up) |
| Breadwig (Magic-User5) | 16488 | 21532 (Level up! Need to get to 40000 xp to level up) |
| Maia (Drow4) | 12086 | 17380 (Level up! Need to get to 32000 xp to level up) |
| Geog (Dwarf5) | 14063 | 19357 (Level up! Need to get to 35000 xp to level up) |
| Magmaranium (Dragonborn3) | 3120 | 8414 (level up x 2! Need to get to 12000 xp to level up) |
| Jutara (Tiefling3) | 3305 | 8599 (Level up! Need to get to 10000 xp to level up) |
| Smuv (Arcane-Bard4) | 3305 | 8599 (Level up x 2! Need to get to 16000 xp to level up) |
Published Content Used
- OSE (Classic and Advanced)
- Creature Compendium (Monsters)
- Grimtooth's Ultimate Traps Collection (Traps)